快速入门
1.强大优势
shadcn/ui 是一套精心设计、可访问性良好的组件和 代码分发 平台。它能和你喜欢的框架、AI 模型一起工作。开源,开放代码。这不是一个现成的组件库,而是你用来搭建自己组件库的方式。
大多数传统组件库的工作模式是:你从 NPM 装一个包,导入组件,然后在应用里直接用。这种模式在你需要根据设计系统去改组件,或者缺少某些组件时,就不太好使了。通常你会被迫包一层库组件、写 hack 去覆盖样式,或者混合多个库的组件,结果 API 风格还不兼容。
这就是 shadcn/ui 要解决的问题。它遵循以下原则:
- 开放代码:组件的顶层代码是开放的,你可以直接改
- 组件组合:所有组件都有统一的、可组合的接口,可预测性强
- 文件分发:用扁平文件结构和
CLI工具来分发组件 - 美观默认:提供精挑细选的默认样式,开箱即用就好看
- 面向智能:开放的代码让
LLMs能读、能理解,甚至能帮你改进
1.1.开放代码
shadcn/ui 把组件的源代码交给你。你有完全的控制权,可以随意定制和扩展。意味着:
- 完全透明:你能看到每个组件的真实实现。
- 轻松定制:想改哪里就改哪里,满足自己的设计和功能需求。
- AI 集成:因为代码是开放的,
LLMs能轻松读懂甚至帮你改进。
在常规库里,你要改一个按钮的行为,通常只能覆盖样式或包一层。而在 shadcn/ui 里,你就直接改按钮代码本身。1.2.
1.2.组件组合
shadcn/ui 的所有组件共享统一的、可组合的接口。如果缺了某个组件,我们会把它引进来,做成可组合的形式,并调整样式,让它能和设计系统里的其他部分搭配起来。统一的接口意味着团队和 LLMs 都能预测行为。你不用为每个新组件学新的 API,哪怕是第三方组件。
1.3.文件分发
shadcn/ui 同时也是一个代码分发系统。它定义了组件的 schema,以及一个 CLI 工具来分发。
- Schema 架构:用扁平文件结构定义组件、依赖和属性。
- CLI 工具:跨框架支持,能在不同项目间分发和安装组件。
你可以用 schema 把组件分发给别的项目,或者让 AI 基于 schema 自动生成新的组件。
1.4.美观默认
shadcn/ui 自带一批有默认样式的组件,这些样式是精挑细选过的:
- 开箱即用:界面简洁、极简风格,不用你额外折腾。
- 统一设计:组件之间天然契合,保持
UI一致性。 - 容易改动:要调整时,可以很方便地覆盖和扩展默认值。
1.5.面向智能
shadcn/ui 的设计让 AI 工具很容易和代码配合。因为代码是开放的,API 一致,LLMs 能读懂逻辑,甚至能生成新的组件。AI 模型能学到你的组件是怎么工作的,给你提改进意见,甚至帮你生成能和现有设计无缝融合的新组件。
2.组件清单
可以大致看看 shadcn/ui 提供的 组件清单。
3.注册中心
实际上我们自己编写的基于 shadcn/ui 也可以被分发,具体 看这里。
4.环境安装
这里我使用我比较熟悉的 Next.js 框架来安装和配置 shadcn/ui,参考文档。
$ npm info shadcn version
3.2.1
$ npx shadcn@latest init
Need to install the following packages:
shadcn@3.2.1
Ok to proceed? (y) y
npm warn deprecated node-domexception@1.0.0: Use your platform's native DOMException instead
✔ The path /home/ljp/git/edtechhub does not contain a package.json file.
Would you like to start a new project? › Next.js
✔ What is your project named? … work-cyber-lifeform # 这个项目名字您看着来起就行
✔ Creating a new Next.js project.
✔ Which color would you like to use as the base color? › Zinc # 这里会选择一款颜色, 可以参考 https://ui.shadcn.com/colors#colors
✔ Writing components.json.
✔ Checking registry.
✔ Updating CSS variables in app/globals.css
✔ Installing dependencies.
✔ Created 1 file:
- lib/utils.ts
Success! Project initialization completed.
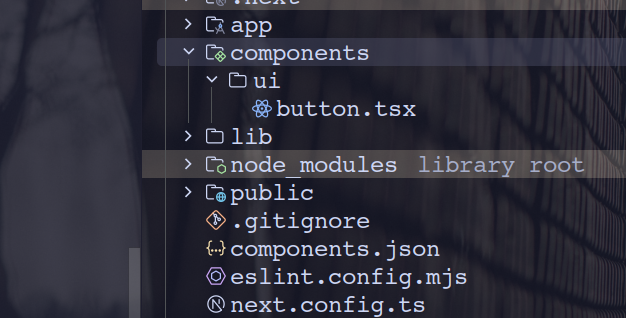
You may now add components.简单看看项目文件目录树。
$ tree -L 1
.
├── app
├── components.json
├── eslint.config.mjs
├── lib
├── next.config.ts
├── next-env.d.ts
├── node_modules
├── package.json
├── package-lock.json
├── postcss.config.mjs
├── public
├── README.md
└── tsconfig.json

4 directories, 9 files
然后先什么都不动,按照里面的 README.md 来进行操作,直接运行 npm run dev。


访问 http://localhost:3000 有可能会看到报错...这个原因应该是和您安装的浏览器插件有关,建议使用无痕浏览器模式来打开网址。

我们修改一下生成的 app.tsx 文件,需要先使用 npx shadcn@latest add button 添加一个按钮组件。这个时候和很多框架不同的地方来了,按钮的源代码直接出现在您的项目里。
// import Image from "next/image";
import {Button} from "@/components/ui/button"

export default function Home() {
    return (
        <div>
            <Button>Click me</Button>
        </div>
    )
    // return (
    //     <div
    //         className="font-sans grid grid-rows-[20px_1fr_20px] items-center justify-items-center min-h-screen p-8 pb-20 gap-16 sm:p-20">
    //         <main className="flex flex-col gap-[32px] row-start-2 items-center sm:items-start">
    //             <Image
    //                 className="dark:invert"
    //                 src="/next.svg"
    //                 alt="Next.js logo"
    //                 width={180}
    //                 height={38}
    //                 priority
    //             />
    //             <ol className="font-mono list-inside list-decimal text-sm/6 text-center sm:text-left">
    //                 <li className="mb-2 tracking-[-.01em]">
    //                     Get started by editing{" "}
    //                     <code
    //                         className="bg-black/[.05] dark:bg-white/[.06] font-mono font-semibold px-1 py-0.5 rounded">
    //                         app/page.tsx
    //                     </code>
    //                     .
    //                 </li>
    //                 <li className="tracking-[-.01em]">
    //                     Save and see your changes instantly.
    //                 </li>
    //             </ol>
    //
    //             <div className="flex gap-4 items-center flex-col sm:flex-row">
    //                 <a
    //                     className="rounded-full border border-solid border-transparent transition-colors flex items-center justify-center bg-foreground text-background gap-2 hover:bg-[#383838] dark:hover:bg-[#ccc] font-medium text-sm sm:text-base h-10 sm:h-12 px-4 sm:px-5 sm:w-auto"
    //                     href="https://vercel.com/new?utm_source=create-next-app&utm_medium=appdir-template-tw&utm_campaign=create-next-app"
    //                     target="_blank"
    //                     rel="noopener noreferrer"
    //                 >
    //                     <Image
    //                         className="dark:invert"
    //                         src="/vercel.svg"
    //                         alt="Vercel logomark"
    //                         width={20}
    //                         height={20}
    //                     />
    //                     Deploy now
    //                 </a>
    //                 <a
    //                     className="rounded-full border border-solid border-black/[.08] dark:border-white/[.145] transition-colors flex items-center justify-center hover:bg-[#f2f2f2] dark:hover:bg-[#1a1a1a] hover:border-transparent font-medium text-sm sm:text-base h-10 sm:h-12 px-4 sm:px-5 w-full sm:w-auto md:w-[158px]"
    //                     href="https://nextjs.org/docs?utm_source=create-next-app&utm_medium=appdir-template-tw&utm_campaign=create-next-app"
    //                     target="_blank"
    //                     rel="noopener noreferrer"
    //                 >
    //                     Read our docs
    //                 </a>
    //             </div>
    //         </main>
    //         <footer className="row-start-3 flex gap-[24px] flex-wrap items-center justify-center">
    //             <a
    //                 className="flex items-center gap-2 hover:underline hover:underline-offset-4"
    //                 href="https://nextjs.org/learn?utm_source=create-next-app&utm_medium=appdir-template-tw&utm_campaign=create-next-app"
    //                 target="_blank"
    //                 rel="noopener noreferrer"
    //             >
    //                 <Image
    //                     aria-hidden
    //                     src="/file.svg"
    //                     alt="File icon"
    //                     width={16}
    //                     height={16}
    //                 />
    //                 Learn
    //             </a>
    //             <a
    //                 className="flex items-center gap-2 hover:underline hover:underline-offset-4"
    //                 href="https://vercel.com/templates?framework=next.js&utm_source=create-next-app&utm_medium=appdir-template-tw&utm_campaign=create-next-app"
    //                 target="_blank"
    //                 rel="noopener noreferrer"
    //             >
    //                 <Image
    //                     aria-hidden
    //                     src="/window.svg"
    //                     alt="Window icon"
    //                     width={16}
    //                     height={16}
    //                 />
    //                 Examples
    //             </a>
    //             <a
    //                 className="flex items-center gap-2 hover:underline hover:underline-offset-4"
    //                 href="https://nextjs.org?utm_source=create-next-app&utm_medium=appdir-template-tw&utm_campaign=create-next-app"
    //                 target="_blank"
    //                 rel="noopener noreferrer"
    //             >
    //                 <Image
    //                     aria-hidden
    //                     src="/globe.svg"
    //                     alt="Globe icon"
    //                     width={16}
    //                     height={16}
    //                 />
    //                 Go to nextjs.org →
    //             </a>
    //         </footer>
    //     </div>
    // );
}
注意
注意:这里其实有个问题我没有整理清楚,就是这里使用 latest 来初始化的项目,后期官方更新了,在此用 latest 来添加组件不知道会不会有问题...总之最好是锁死版本号叭...
5.项目配置
在初始化阶段还会生成 components.json 文件,这里包含您的项目配置,参考 官方文档。
{
  "$schema": "https://ui.shadcn.com/schema.json", # JSON Schema 地址, 用于编辑器提示和验证文件结构
  "style": "new-york", # 组件的样式, 初始化后不能更改
  "rsc": true, # 当设置为 true 时, CLI 会自动向客户端组件添加 use client 指令
  "tsx": true, # 将此选项设置为 false 允许以 .jsx 文件扩展名将组件作为 JavaScript 添加
  "tailwind": {
    "config": "", # Tailwind 配置文件路径, 如果为空, 默认读取项目的 tailwind.config.js
    "css": "app/globals.css", # Tailwind 样式的入口文件路径, 例如 "app/globals.css", 要使用 CSS 变量进行主题设置请务必开启
    "baseColor": "zinc", # 颜色主题, 例如 "zinc", 初始化后无法更改
    "cssVariables": true, # 是否开启 CSS 变量来控制颜色等设计属性, 初始化后无法更改
    "prefix": "" # Tailwind 的类名前缀, 如果不为空,会在所有类名前加前缀
  },
  "iconLibrary": "lucide", # 默认图标库
  "aliases": { # 定义项目中常用目录的别名, 例如 'import Button from "components/Button"' 来简化书写
    "components": "@/components",
    "utils": "@/lib/utils",
    "ui": "@/components/ui",
    "lib": "@/lib",
    "hooks": "@/hooks"
  },
  "registries": {} # 组件注册中心
}
6.样式风格
可以快速使用 shadcn 提供的类来把原生的组件转化为和 shadcn 组件库中相似的组件。
重要
补充:实际上有两种方式。
CSS VariablesUtility Classes
一般用前一种方式。
// import Image from "next/image";
import {Button} from "@/components/ui/button"

export default function Home() {
    return (
        <div>
            <button>
                普通按钮
            </ button>
            <button className="bg-primary text-primary-foreground px-4 py-2 rounded">
                自定按钮
            </button>
            <Button>
                组件按钮
            </Button>
        </div>
    )
    // return (
    //     <div
    //         className="font-sans grid grid-rows-[20px_1fr_20px] items-center justify-items-center min-h-screen p-8 pb-20 gap-16 sm:p-20">
    //         <main className="flex flex-col gap-[32px] row-start-2 items-center sm:items-start">
    //             <Image
    //                 className="dark:invert"
    //                 src="/next.svg"
    //                 alt="Next.js logo"
    //                 width={180}
    //                 height={38}
    //                 priority
    //             />
    //             <ol className="font-mono list-inside list-decimal text-sm/6 text-center sm:text-left">
    //                 <li className="mb-2 tracking-[-.01em]">
    //                     Get started by editing{" "}
    //                     <code
    //                         className="bg-black/[.05] dark:bg-white/[.06] font-mono font-semibold px-1 py-0.5 rounded">
    //                         app/page.tsx
    //                     </code>
    //                     .
    //                 </li>
    //                 <li className="tracking-[-.01em]">
    //                     Save and see your changes instantly.
    //                 </li>
    //             </ol>
    //
    //             <div className="flex gap-4 items-center flex-col sm:flex-row">
    //                 <a
    //                     className="rounded-full border border-solid border-transparent transition-colors flex items-center justify-center bg-foreground text-background gap-2 hover:bg-[#383838] dark:hover:bg-[#ccc] font-medium text-sm sm:text-base h-10 sm:h-12 px-4 sm:px-5 sm:w-auto"
    //                     href="https://vercel.com/new?utm_source=create-next-app&utm_medium=appdir-template-tw&utm_campaign=create-next-app"
    //                     target="_blank"
    //                     rel="noopener noreferrer"
    //                 >
    //                     <Image
    //                         className="dark:invert"
    //                         src="/vercel.svg"
    //                         alt="Vercel logomark"
    //                         width={20}
    //                         height={20}
    //                     />
    //                     Deploy now
    //                 </a>
    //                 <a
    //                     className="rounded-full border border-solid border-black/[.08] dark:border-white/[.145] transition-colors flex items-center justify-center hover:bg-[#f2f2f2] dark:hover:bg-[#1a1a1a] hover:border-transparent font-medium text-sm sm:text-base h-10 sm:h-12 px-4 sm:px-5 w-full sm:w-auto md:w-[158px]"
    //                     href="https://nextjs.org/docs?utm_source=create-next-app&utm_medium=appdir-template-tw&utm_campaign=create-next-app"
    //                     target="_blank"
    //                     rel="noopener noreferrer"
    //                 >
    //                     Read our docs
    //                 </a>
    //             </div>
    //         </main>
    //         <footer className="row-start-3 flex gap-[24px] flex-wrap items-center justify-center">
    //             <a
    //                 className="flex items-center gap-2 hover:underline hover:underline-offset-4"
    //                 href="https://nextjs.org/learn?utm_source=create-next-app&utm_medium=appdir-template-tw&utm_campaign=create-next-app"
    //                 target="_blank"
    //                 rel="noopener noreferrer"
    //             >
    //                 <Image
    //                     aria-hidden
    //                     src="/file.svg"
    //                     alt="File icon"
    //                     width={16}
    //                     height={16}
    //                 />
    //                 Learn
    //             </a>
    //             <a
    //                 className="flex items-center gap-2 hover:underline hover:underline-offset-4"
    //                 href="https://vercel.com/templates?framework=next.js&utm_source=create-next-app&utm_medium=appdir-template-tw&utm_campaign=create-next-app"
    //                 target="_blank"
    //                 rel="noopener noreferrer"
    //             >
    //                 <Image
    //                     aria-hidden
    //                     src="/window.svg"
    //                     alt="Window icon"
    //                     width={16}
    //                     height={16}
    //                 />
    //                 Examples
    //             </a>
    //             <a
    //                 className="flex items-center gap-2 hover:underline hover:underline-offset-4"
    //                 href="https://nextjs.org?utm_source=create-next-app&utm_medium=appdir-template-tw&utm_campaign=create-next-app"
    //                 target="_blank"
    //                 rel="noopener noreferrer"
    //             >
    //                 <Image
    //                     aria-hidden
    //                     src="/globe.svg"
    //                     alt="Globe icon"
    //                     width={16}
    //                     height={16}
    //                 />
    //                 Go to nextjs.org →
    //             </a>
    //         </footer>
    //     </div>
    // );
}
而如果需要需要修改 TCSS 的样式风格,就需要:
CSS选择器的知识TCSS的知识
然后在 tsconfig.json 中尝试修改即可。
7.黑暗模式
首先我们人为规定,自己编写的组件放置在 components/ui/ 同级目录下,然后创建一个 theme-provider.tsx 文件。
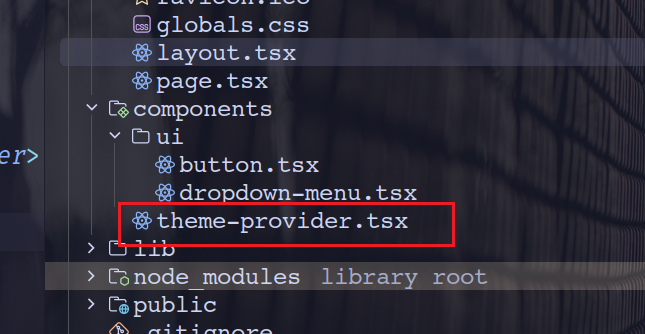
npm install next-themes8.指令选项
前面说了那么多还没系统介绍过 CLI 程序的使用,不过我觉得这个 看看文档 就可以了...这里做一个精简:
- 使用
npx shadcn@latest init命令初始化新项目的配置和依赖项 - 使用
npx shadcn@latest add [组件]命令将组件和依赖项添加到您的项目中 - 在安装前,使用
npx shadcn@latest view [组件]命令查看注册表中的项目 - ...